

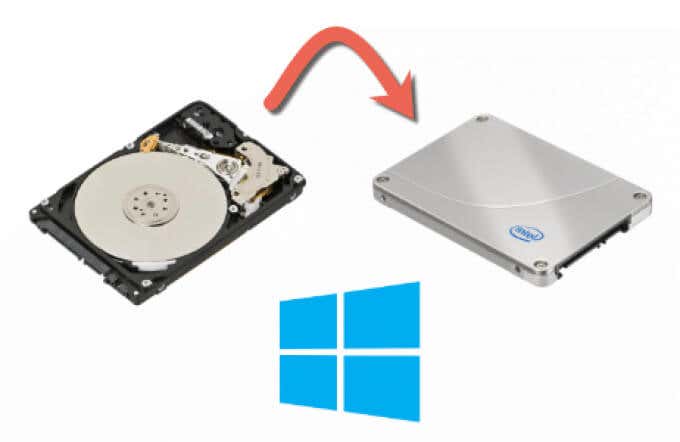
You’ll need to consider your options if you just upgraded your PC and want to move Windows 10 to a new hard drive. Beginners might have trouble with this job, but they don’t have to. All you have to do is figure out how to move your files from A to B and make sure Windows will boot from your new drive.
You could make a new system image to move from one drive of the same size to another. If your drives are different sizes, you could consider cloning your hard drive to copy your installation. Here are the steps you need to take to get started.

Ahead of Installing Windows 10 on a Brand-New Drive
You should back up your essential data separately from any new system image you make before attempting to move Windows 10 to a new hard disc.
Even though this procedure shouldn’t affect your original disc or files, overwriting the original drive could result in lost information. A separate backup of your files on removable media (such as a USB drive) or in the cloud should be performed regularly to ensure the security of your information.
After you’ve made a copy of your important data, you’ll have a few options. Moving Windows 10 to a new hard drive requires different steps depending on whether the new drive is of the same or bigger capacity or if it is smaller.

Only the drive’s size matters; therefore, switching from a standard drive to a hybrid or solid-state drive makes no difference. Using Windows’ in-built system imaging capabilities, you can clone your current disc and transfer its contents to a new drive of equal or more significant capacity.
However, Windows will display an error throughout the re-imaging process if you try to use this method to move to a drive more minor than the original. Alternatively, you’ll need to use third-party software to correctly copy the files from the larger drive to the smaller one while migrating to Windows 10.
Make a Fresh Installation Disk to Transfer Windows to Larger Disks.
Utilizing Windows’ built-in system imaging tool is recommended to move Windows 10 to a new hard drive of the same or greater capacity. This method can make an exact replica of your old drive on the new one.
It cannot be overstated that the drive must be of equal or bigger capacity for this method to operate. If it’s not too large, you can use the instructions below to convert it using another program.
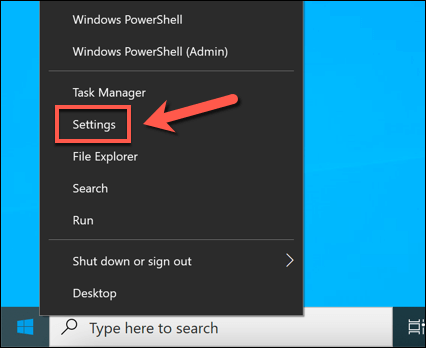
1. To get started, you’ll need to generate a brand-new system image for your Windows setup. When you right-click the Start button, a menu will pop up that lets you choose Settings.

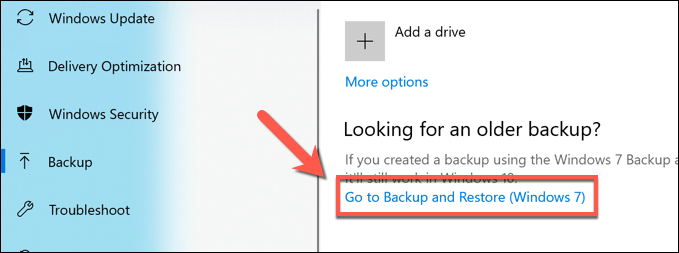
2. You may access Backup by going to Update & Security > Settings in the main menu. To access an older backup, choose Go to Backup and Restore (Windows 7) from the Backup menu. Category.

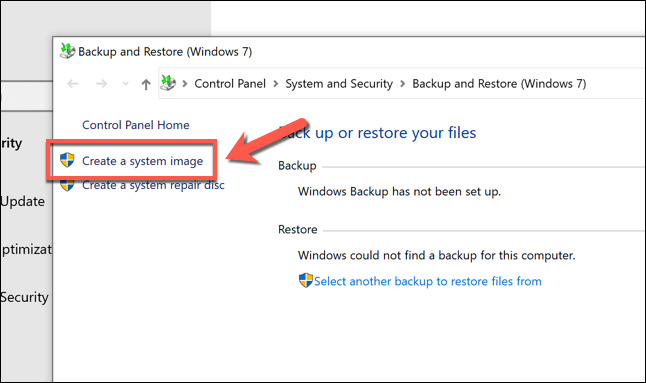
3. Use the Create a system image option in the left menu of the classic Control Panel window. Unless you want to save your system image to a shared place over the network, you should now plug in an external disc (such as an external USB hard drive) (such as a network-attached storage device).

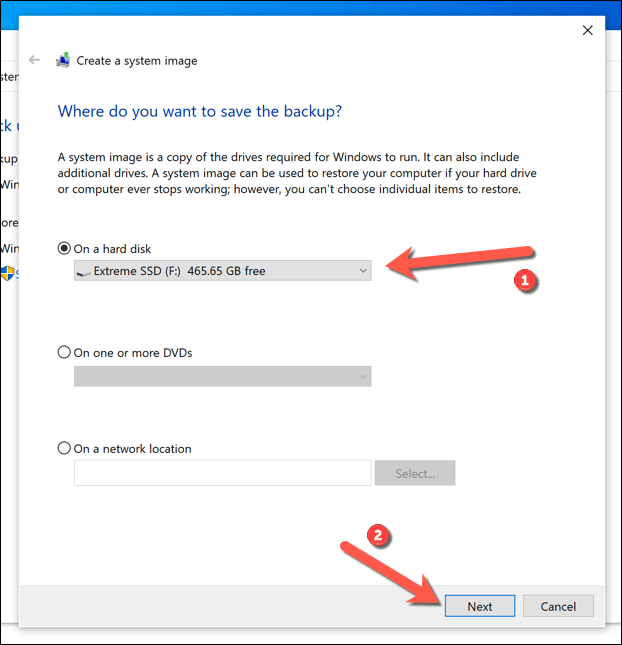
4. When you click the Create a system image menu will go up, and your computer or network will immediately begin looking for an appropriate spot to store the system image. Choose this option from the On a hard disc drop-down box if you’re working with a portable hard drive. Select On a network location if you want to save the file to a shared drive on the network, and then navigate to the shared drive’s location. To proceed, use the Next button.

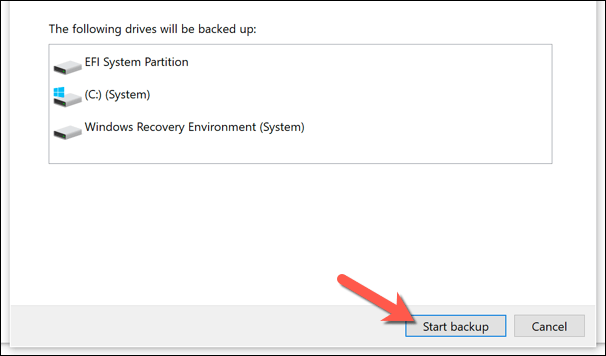
5. Windows will verify which disc partitions will be included in the system image backup. Just click the button labeled “Start Backup” to get going.

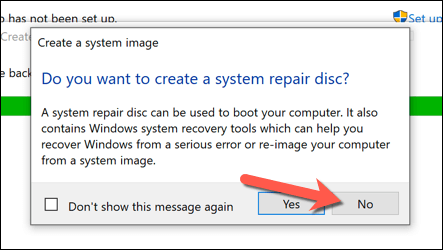
6. Do not interrupt the system image creation process. When done, Windows will ask if you want to make a new repair DVD for your computer. This might be the best course of action if you mess up your MBR or GPT boot files. Either Yes or No will get you through, though.

When you have finished building the new system image, you can transfer it to the new storage device. Now is the time to hook up the replacement hard disc and remove the old one. The alternative is to replace the current hard drive, reformat it, and use it as a supplementary storage device.
Transfer Windows to a New Drive with the Help of a System Image
Once you have a new system image of your current drive, you can use it to make a complete copy of your Windows installation on a new hard drive. As we’ve already said, you can only do this if the new drive is the same size or more significant than the old one.
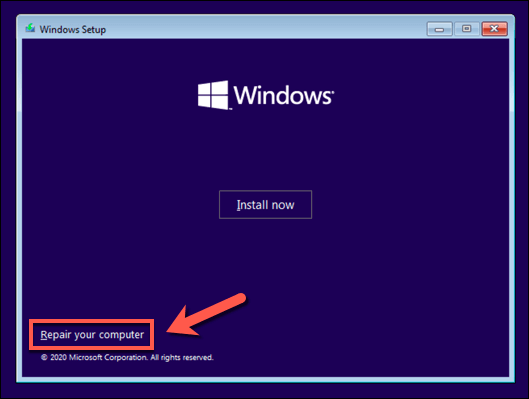
- Put in your Windows installation media, which can be a USB memory stick or DVD that you can take with you. Once it’s in, turn on your PC and make sure that the BIOS or UEFI settings give that drive the most importance. Once the Windows installation menu comes up, click Next, and then in the bottom left corner, click Repair your computer.
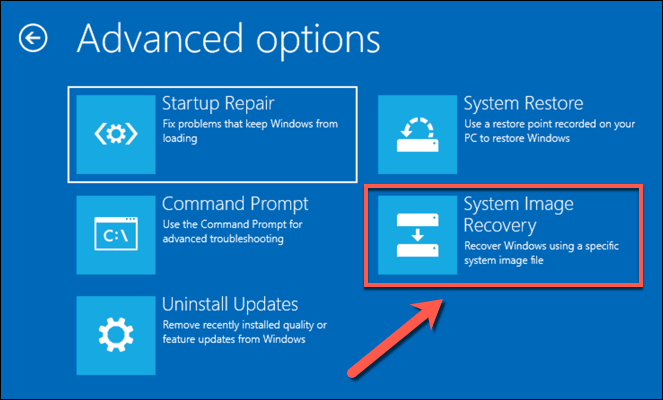
- Select Troubleshoot > System Image Recovery from the Advanced Options menu.
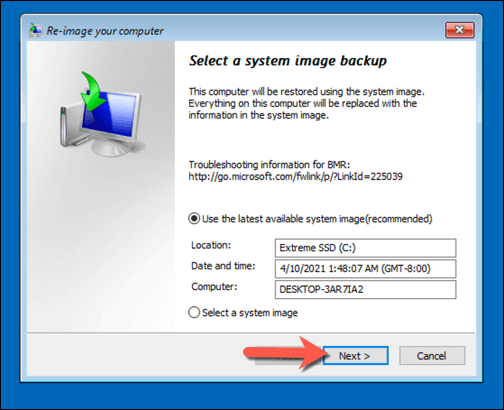
- In the Re-image your computer menu, Windows should find the system image on your external hard drive on its own. If it doesn’t, choose the option “Select a system image” to find it yourself. If you don’t want to do that, leave the option Use the latest available system image (recommended) selected and click Next to move on.
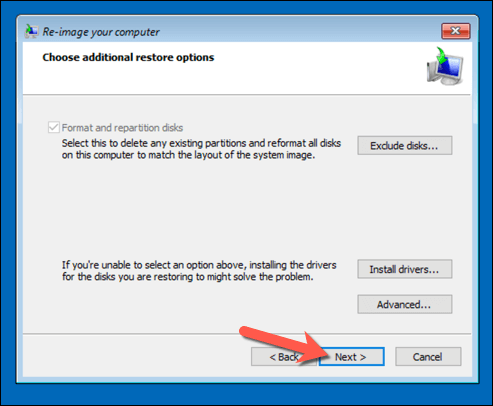
- The new system image will be used to set up your new hard drive with the same partitions as the old drive. First, choose Exclude discs and uncheck any partitions you want to leave out. If not, click Next to move on.
- To start the disc imaging process, choose Finish > Yes. This will take some time to finish. Once this is done, click Restart Now to get your PC to start up. At this point, you can take out the Windows installation drive or disc. You may also need to change the settings in BIOS or UEFI to make sure that the new drive is the first one to boot from.


If you copied your files to a new drive of the same size, you don’t need to do anything else. Windows will boot as usual, and you can continue using your PC. But if you have cloned your drive to a larger drive, you may need to take extra steps to use the extra space.
After restoring a system image, you should resize the system partition.
A system image copies your whole drive, making all of the partitions on the new drive the same size as the ones on the old drive. If you used a system image to move Windows to a larger hard drive, you’d need to resize the system partition (C:) to use all the space on the new drive.
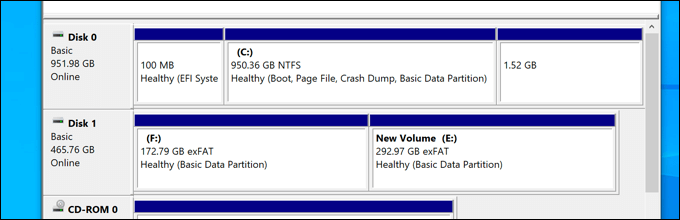
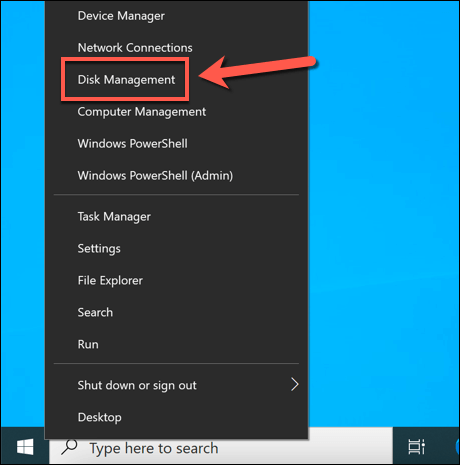
- To do this, boot your new drive into Windows and sign in. Right-click the Start menu and choose “Disk Management” from the menu.
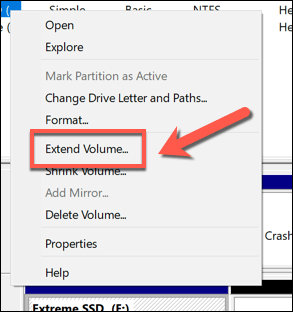
- Right-click your system partition (C:) in the Disk Management menu and choose Extend Volume.
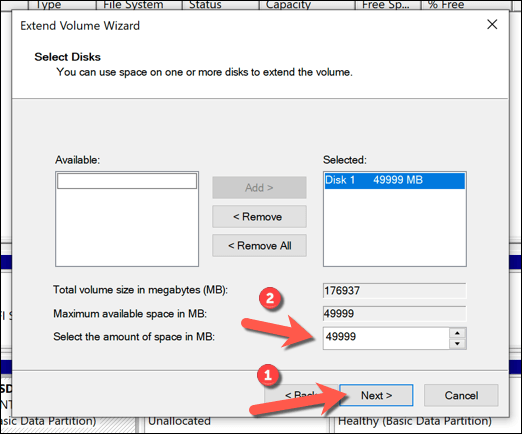
- From the Extend Volume Wizard menu, choose Next. Make sure the number of megabytes (MB) of additional space selected in the Select, the amount of space in the MB box is equal to the number of MB listed in the Maximum available MB box. Click Next to move on.
- Check that the information is correct, and click Finish to finish the process.
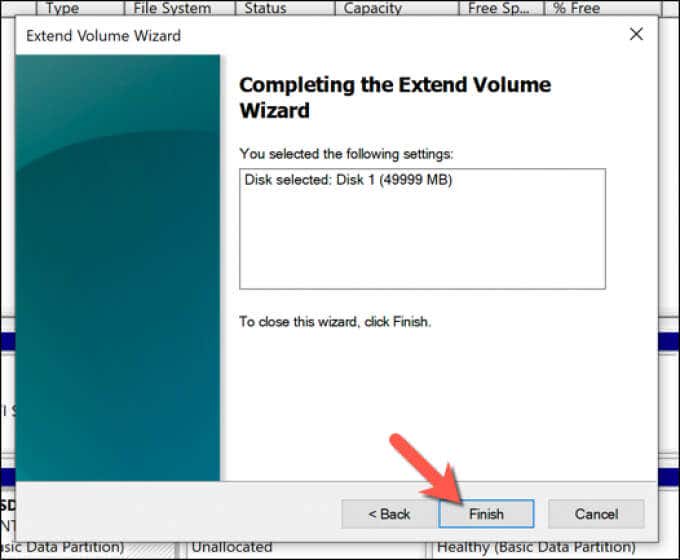


After a few seconds, your system partition will be expanded to include the extra space on your drive. This will ensure that all the space on your drive can be used.
Using Third-Party Software, Move Windows 10 to a Newer, Larger Hard Drive
Still, the best way to move Windows 10 to a new hard drive is to use a new system image to clone your hard drive. Since this method doesn’t work if you’re moving Windows from a larger drive to a smaller one, you’ll need to use third-party software instead.
For this method, there are many tools, but Macrium Reflect Free is a good (and free) choice. With the accessible version of Macrium Reflect, you can copy your Windows installation from a larger drive to a smaller one and change the size of the partition table at the same time. You can also copy Windows to a larger drive if you’d rather.
Prior to proceeding, check that both the old and new hard drives are properly attached to the computer and that Windows can recognize them.
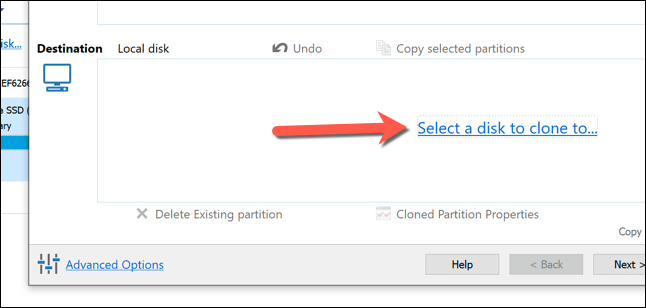
- Go to the Macrium Reflect website and download and install the free Home Use version of Macrium Reflect. After the program has been installed, start it up and verify that the system partition (C:) has been select. Once it is chosen, choose the option below that says, “Clone this disc.” In the Clone menu, under “Destination,” choose your new, smaller drive by clicking “Select a disc to clone to.”
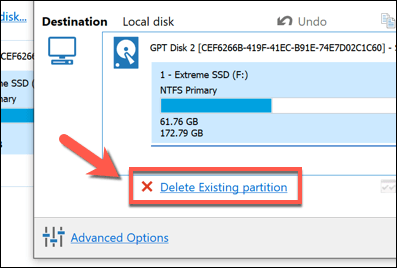
- With the new disc selected, you’ll need to delete any existing partitions on the drive by selecting them in the Destination category and then choosing the Delete Existing partition option.
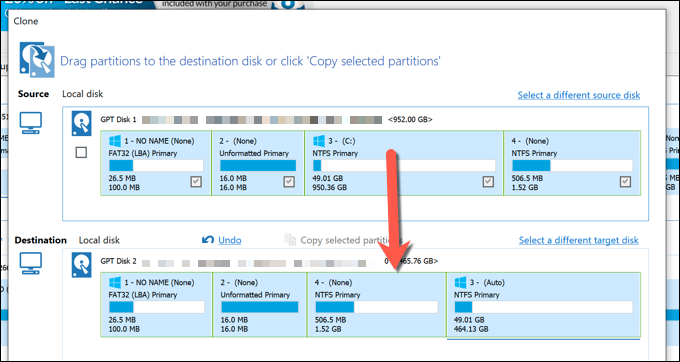
- After removing any partitions that were already on your new drive, drag and dropped each of your drive’s partitions (except for the system C: partition) from the Source category to the Destination category. Your system partition (C:) should be the last thing you drag and drop into the Destination category.
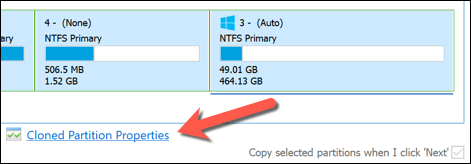
- Macrium Reflect can resize your system partition to fit entirely on your new drive if it is smaller than the old one. If you want to enlarge your C: partition, pick it in the Destination category and Select Cloned Partition Properties.
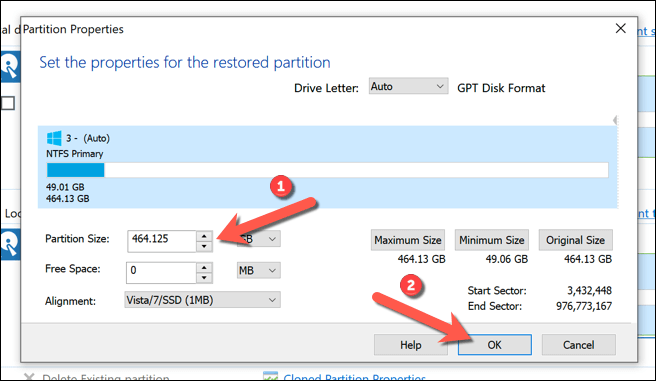
- Use the Partition Size box on the Partition Properties menu to change your partition size. If you’re using a bigger drive, ensure sure “Free Space” says “0 MB” Select OK to confirm the change.
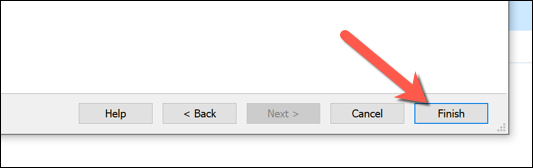
- To confirm your cloning choices, click Finish.
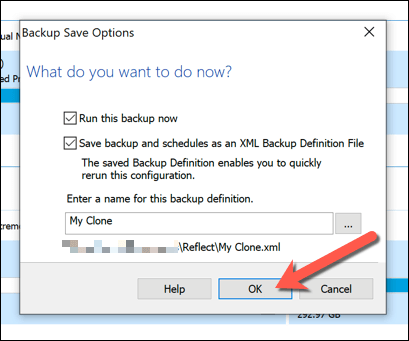
- Leave the options in the following menu, Backup Save Options, and click OK to confirm.
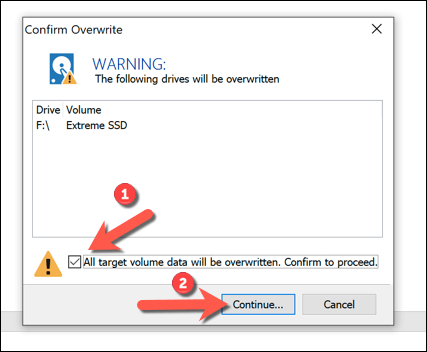
- Macrium will need permission to delete the existing partitions and start the cloning process. Choose the checkbox you want from the Confirm Overwrite menu, then click Continue to move forward. Give the cloning process some time to finish.


Once the process is done, your old hard drive with Windows and all your other files will be copied to your new drive. At this point, you can turn off your PC and remove your old hard drive or use Disk Management to format it and use it for something else.
Final Steps
Whether you use a Windows 10 system image to move to a new drive of the same size or third-party software like Macrium Reflect to clone it, you’ll be able to boot up and use the new drive immediately. The new drive is more significant than the old one, you may need to change the size of your system partition.
If you have problems, you might want to reinstall Windows 10 and start over instead of cloning the whole drive. and by doing this , you won’t lose your personal files, but you may have to reinstall your software and transfer your Windows 10 license.